


There’s nothing like the comfort of a hot dosa fresh off the tawa, and this recipe with my easy homemade batter will help you nail it right at home – so you can make dosas just how you like, whenever you want!
Hey dosa/dosai lovers – I’m talking to you! We’re from Bangalore and dosa is a weekly ritual for us – if not multiple times in the week! And with all the varieties to choose from, be it Neer Dosa, Millet Dosa, Mysore Masala Dosa, I can go on and on….
I can have dosa any time of the day, though there’s something about starting your mornings with one straight off the pan. With this recipe (part of my NEW Idli Dosa Batter Series!), I’ll show you how to make the classic dosa EASILY from scratch – including the idli-dosa batter – so you get that signature golden crisp and soft center every time 🤌🤌🤌
And the best part? There’s absolutely nothing to be intimidated about because making the homemade batter is incredibly easy and comes together with just 20 minutes of hands-on time (the rest is just soaking/fermentation time!). Make it once, and you’ll never go back to buying store bought batter – trust me!
Jump to section: Dosa Recipe
Ingredients To Make Dosa
Idli Rice – this is short grain parboiled rice which we use for best results. In a pinch, sona masoori rice also works
Urad Dal – used for that creamy, airy texture
Flattened Rice/Poha – for that fluffy, airy texture of the batter
Cooked Rice – this for that perfect crispiness!
Fenugreek Seeds/Methi – aids the fermentation process and adds to the taste
Cold Water – to prevent the batter from heating up while grinding
Salt – added after fermentation to to season the batter
How to make Dosa
- Heat a non-stick tawa pan or a seasoned iron dosa pan over medium heat. Sprinkle some water on the pan to check the heat (if the water sizzles and evaporates quickly, the pan is hot enough to use). Wipe the pan clean.
- Pour one ladle of dosa batter and spread it by using the back of the ladle, moving it in concentric circles to form a big round dosa.
Troubleshooting: If your batter sticks to the pan while spreading, it means that either the pan is too hot or the batter is too thick. You can reduce the flame first and if the problem persists, you can pour some water into the batter to thin it out.
- Pour a spoon of oil or ghee all around, and let roast for about 1-2 minutes. The edges of the dosa will start to come off the pan now. When this happens, flip the dosa over and roast for 30 seconds. Use a dosa turner spatula to do this. Flip it back, fold and serve hot. Use a dosa turner spatula to do this.
Note:
- For a paper-thin, crispy dosa – pour a thin layer of the batter and don’t flip it.
- For a fluffier dosa – you can keep the batter thick and even cover the dosa with a lid to trap steam.
- For masala dosa, add the masala filling to the dosa before folding
Which Dosa Pan Is Better — Cast Iron or Non-Stick?
If you’re wondering what pan to use to make dosas, I’ve got you. Both work, but here’s how they compare:
Cast Iron Tawa
- Retains high heat well, which gives you that signature crispy, golden dosa
- Naturally non-stick once well-seasoned
- Durable — lasts forever with proper care
- Needs maintenance (seasoning + cleaning properly) – but don’t worry, I have a proper guide on how to clean and season cast iron pans
- Heavier and takes longer to heat up
Best for: People who make dosa regularly, love a crisp texture, and don’t mind the upkeep
Non-Stick Tawa
- Easy to use and clean — great for beginners
- Requires less oil
- Lightweight and heats quickly
- Doesn’t get as hot, so dosa may be softer and paler
- Can wear out over time, especially with metal utensils
Best for: Occasional dosa makers or anyone who prefers low-maintenance cookware
Frequently Asked Questions
Dosa is made from a fermented batter of rice, urad dal, poha, and methi seeds. It’s naturally vegan and gluten-free!
There could be a few reasons for this:
– Batter may be too thick – thin it slightly with water
– Tawa not hot enough
– Not enough oil/ghee
– Batter hasn’t fermented well – fermentation takes anywhere from 12 to 24 hours. Once fermented, the batter would have a slight dome shape with specks and bubbles on top. You should be able to smell a slightly sour smell coming from the batter. This smell means it has fermented.
Yes — but for the crispiest, most flavorful dosa, homemade batter always wins.
You can, but both poha and cooked rice adds lightness and helps with fermentation. We also use them because we make ONE batter for idli and dosa and this gives you optimum results for both. It can be skipped but I highly recommend it.
We season the batter AFTER it has fermented – so make sure to do this once you see that the batter is ready. If making dosas, add 3/4 teaspoon of salt and ½ tsp of sugar and mix well (the sugar helps add colour to the dosas when cooking). If making idli, add ¾ teaspoon of salt and mix well.
If you are unable to spread your dosa, it means that either the pan is too hot or the batter is too thick. You can reduce the flame first and if the problem persists, you can pour some water into the batter to thin it out.
Richa’s Tips for the Best Dosai Ever
- Use cold water for grinding to prevent the batter from heating up and affecting fermentation. I use ice cold water. Ferment in a warm spot — near a window, inside an oven with the light on, or wrapped in a towel.
- Use a non-stick dosa tawa or an iron tawa. Personally, I love the results that an iron tawa gives but I know how hard it can be to maintain so a non-stick dosa tawa works in a jiffy. For best results, don’t use the tawa for anything else except dosas to maintain the quality of both the dosas and the tawa for a long long time.
- Make sure to check that your pan is hot before spreading the batter – you can do this by sprinkling a few drops of water on the pan. If the water sizzles and evaporates quickly, then the pan is hot enough.
Serving Ideas
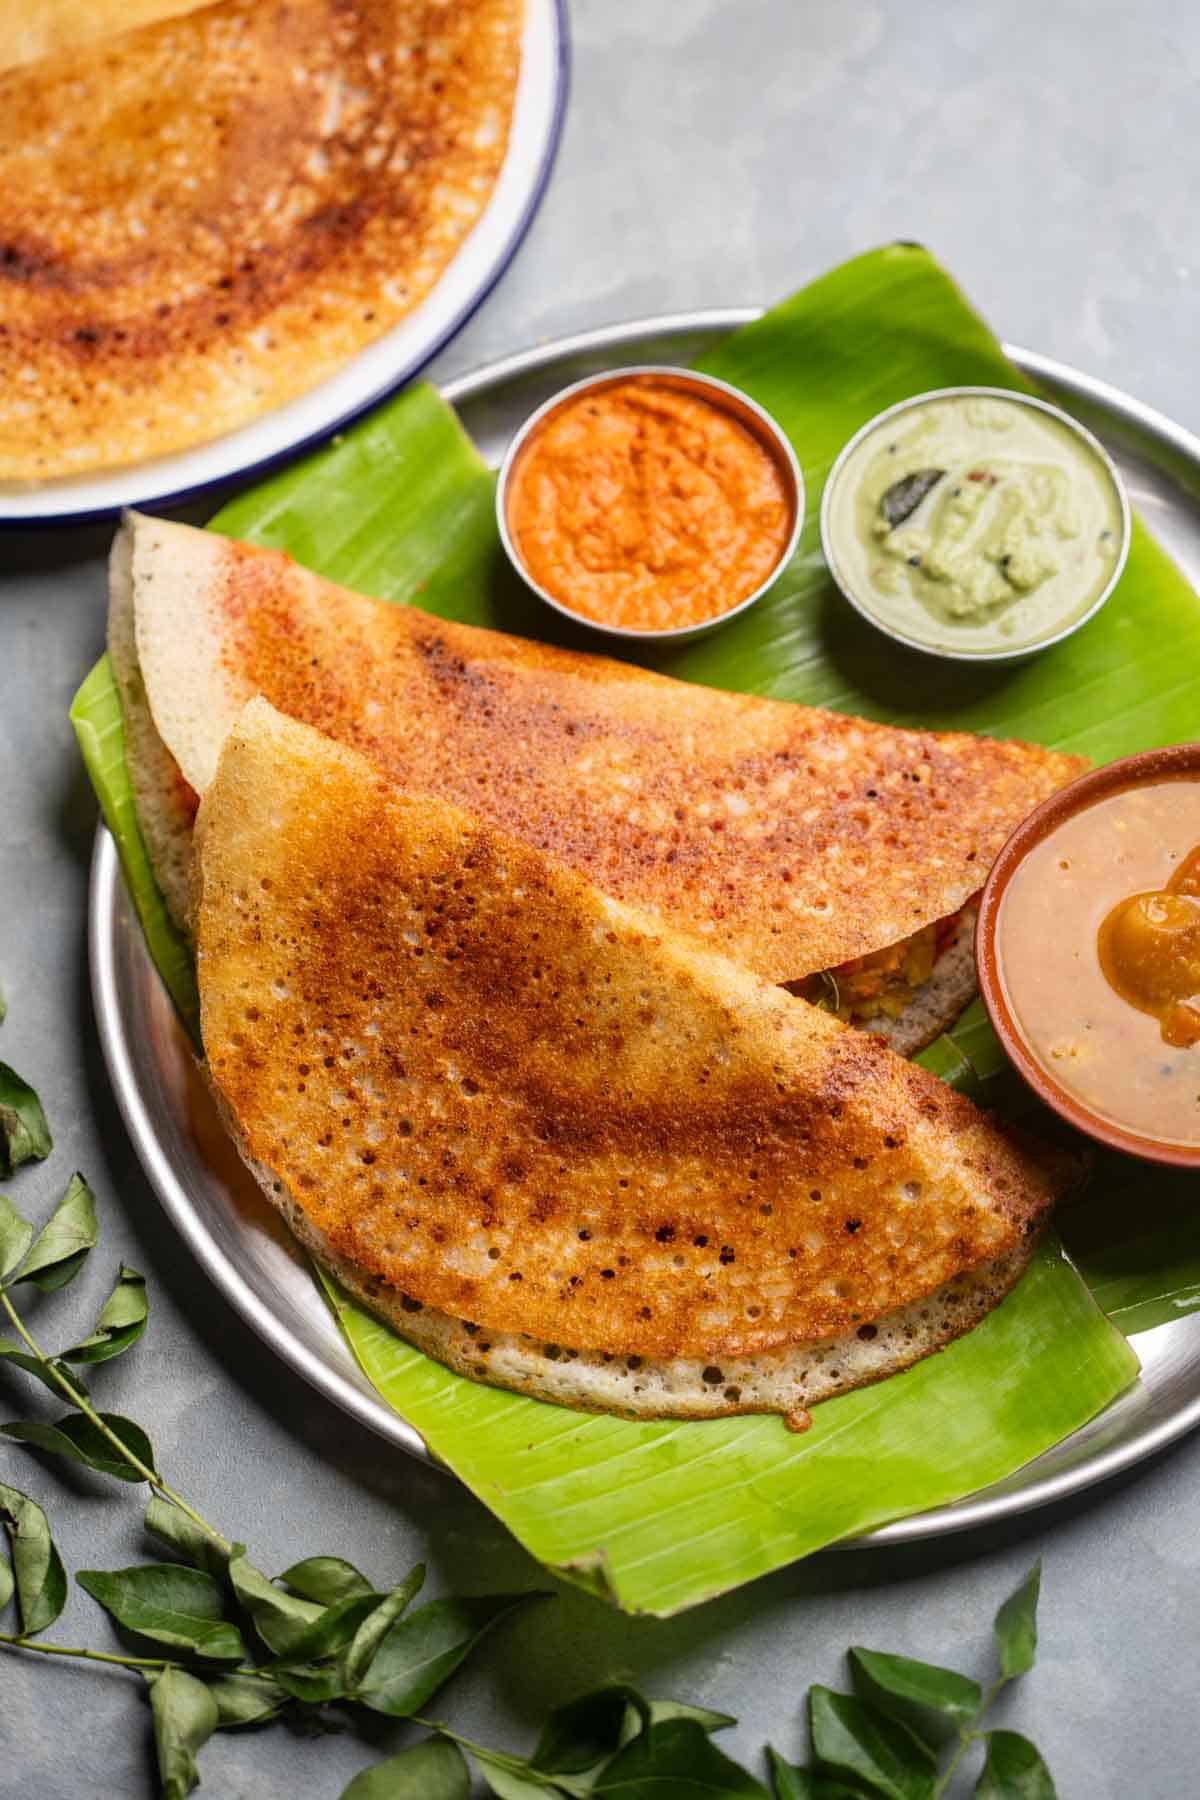
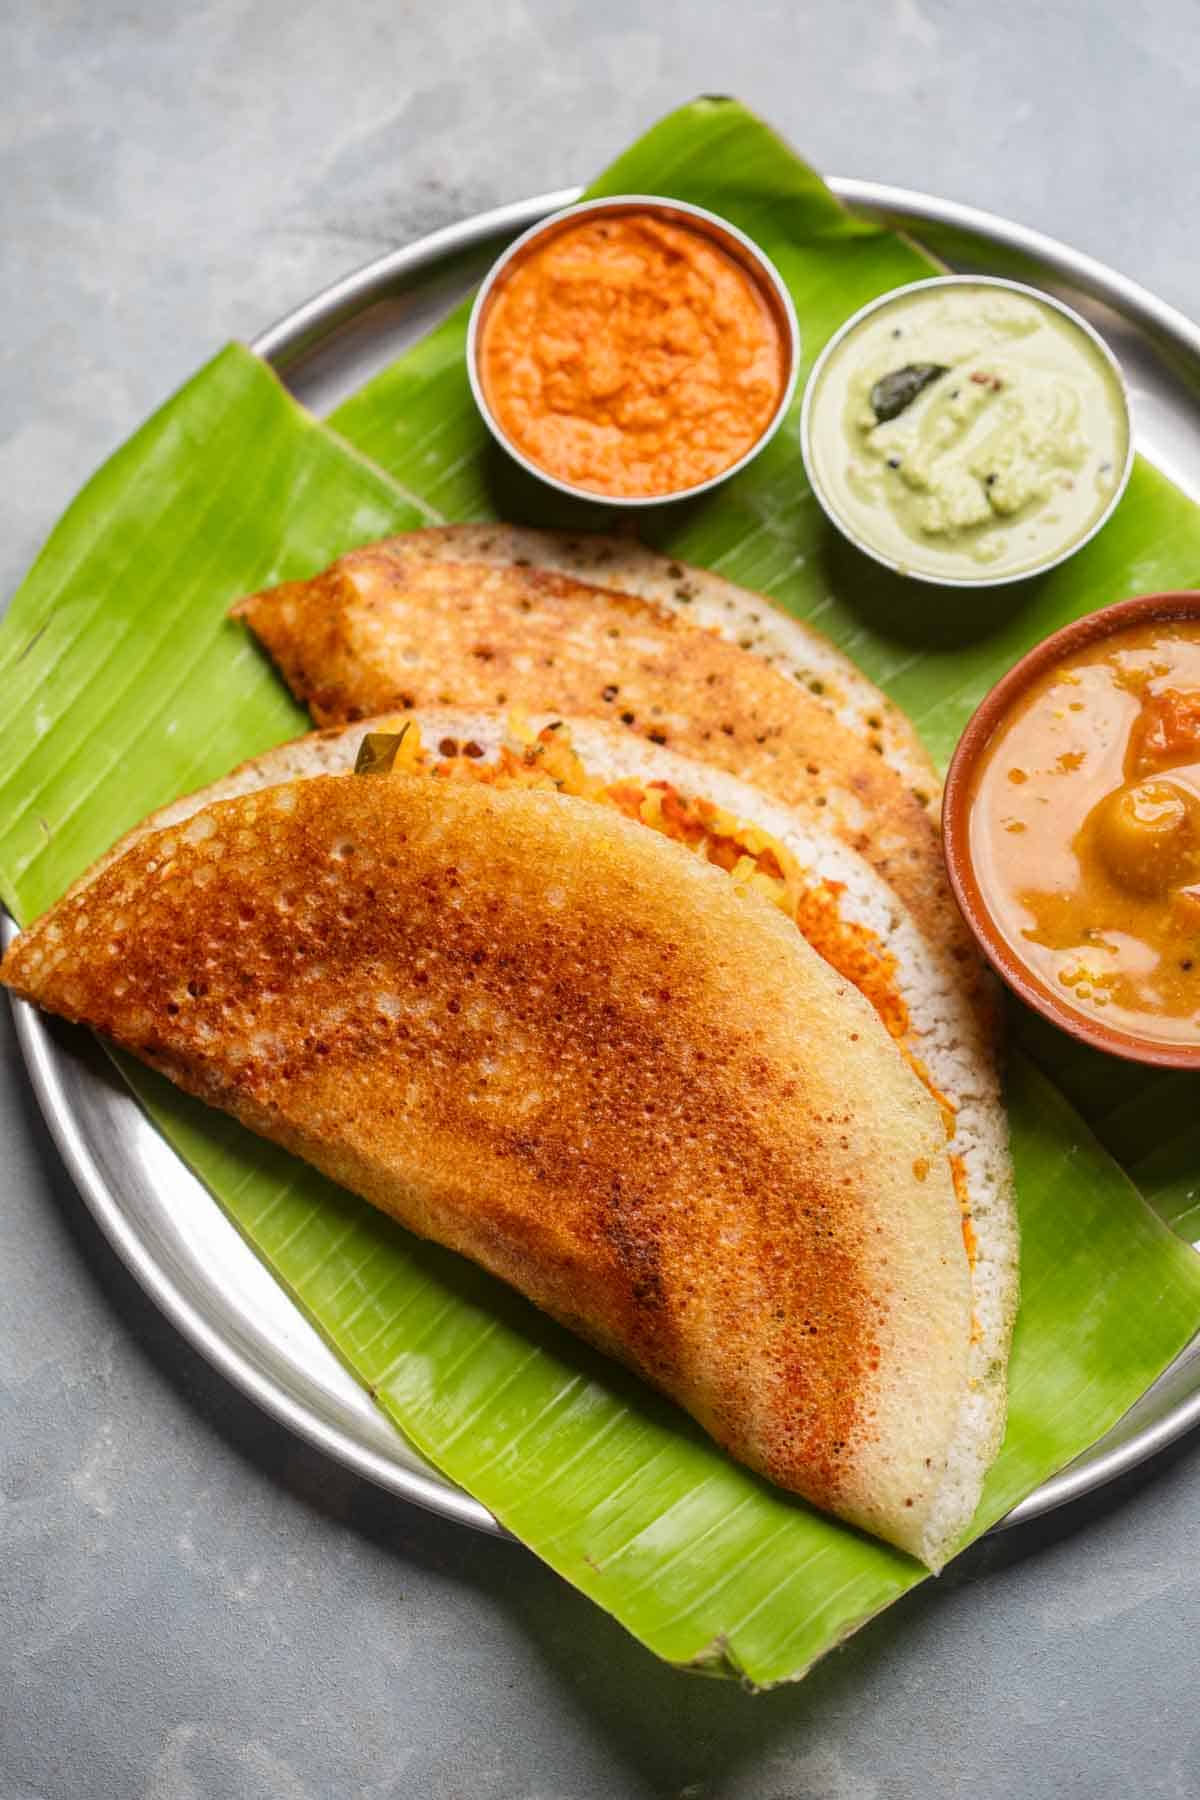
- Serve this dosa with your favorite chutneys (I love coconut, peanut and tomato) and sambar
- You can also turn this into a masala dosa by stuffing it with an aloo masala filling
- Enjoy it on its own with some ghee and podi on the side – one of my favorite ways to have a classic plain dosa!
Storage Tips
- Enjoy the dosa fresh off the tawa – cooked dosas don’t store well
- Fermented batter lasts up to 3 days in the fridge. After that, it becomes too sour
- You can even freeze the batter in single use batches and use for up to a month
- Batter tends to thicken over time — add a splash of water to loosen it and stir before use
Recipes With Idli Dosa Batter
- Dhokla
- Idli
- Dosa
- Appe / Paniyaram
- Mysore Masala
- Uttapam
- Dosa Waffle
- Schezwan Idli Fry
Once you’ve tried out this dosa recipe, there’s no going back. With this recipe up your sleeve, you’ll have restaurant-style crisp dosas on the regular — and your breakfast (or any other meal that you choose to make this for like meee :P) game will never be the same.
If you liked this recipe, be sure to stay tuned for more as part of my Idli Dosa Batter series, and send me your recreations over on my IG @my_foodstory!
Watch Dosa Recipe Video

Dosa Recipe | How To Make Dosa
Ingredients
For dosa batter
- 1 ½ cups idli rice or parboiled rice
- ½ cup skinned urad dal
- ¼ cup poha or flattened rice
- ¼ cup cooked rice
- 1 teaspoon methi seeds fenugreek seeds
- 1 ½ cups water
- 4-5 ice cubes
For Dosas
- 1 cup dosa batter
- ¼ teaspoon salt
- ⅛ teaspoon sugar
- 1 onion cut into half horizontally
- 2 teaspoons cooking oil or ghee
Instructions
-
Day 1 – morning1 ½ cups idli rice or parboiled rice, ½ cup skinned urad dal, ¼ cup poha, 1 teaspoon methi seeds
-
Wash and soak idli rice, urad dal, poha and methi seeds in enough water in a way that there is at least an inch of extra water over the rice and dal.
-
Day 1 – evening
-
Once the grains have soaked for about 8 hours, drain the excess water from the bowl.
-
Grind the idli rice-urad dal mix with cooked rice until almost smooth with approx. 1 ½ cups water and 4-5 ice cubes in a mixer grinder. Add additional water if required. The consistency should be such that it can leave a thick coat on the back of a spoon and falls in a ribbon like consistency when poured with a ladle. The ground batter should feel very slightly gritty between your fingers.¼ cup cooked rice, 1 ½ cups water, 4-5 ice cubes
-
Pour the batter into a bowl that’s large enough so that there is room for the batter to rise. Mix the batter with clean hands as shown in the video – this is an important step as it helps in the fermentation so please don’t skip it.
-
Cover the bowl and set aside to ferment. Leave it in a warm, dry place away from direct sunlight to ferment. Fermentation takes anywhere between 12-24 hours depending on the humidity and temperature at your place. The warmer it is, the faster it’ll ferment.
Day 2 – morning or afternoon:
-
Once fermented, the batter should have become almost 1.5 times its size with a slight dome shape and a wrinkle, bubbly layer on top. You should be able to smell a little sourness in the batter. This smell means it has fermented. If it is too sour, it has fermented too much! You can use a spoon to check the batter – the texture should be frothy with air bubbles. This will yield approx. 1.75 litres (6-7 cups) of batter.
Prepping batter:
-
take 1 cup of batter in a bowl, add salt, sugar and mix well.1 cup dosa batter, ¼ teaspoon salt, ⅛ teaspoon sugar
Prepping tawa or pan:
-
Heat a non-stick pan or a seasoned cast iron dosa tawa over medium heat. Once hot, pierce the onion half with a fork, dip in oil & rub it on the tawa. This prevents the dosa from sticking to the tawa.1 onion cut into half horizontally
Making Dosa:
-
Reduce the heat to low & pour one ladle of dosa batter and pour in the center of the tawa. Spread by using the back of the ladle, moving it in concentric circles to form a big round dosa.
Roasting dosa:
-
Increase the heat to medium. Drizzle a spoon or two of oil or ghee around the edges and in the center, cover with lid & cook for 30 seconds.2 teaspoons cooking oil or ghee
-
Remove the lid and let this roast for 1-2 minutes till golden brown on medium.
-
Flip it over and roast for 30-seconds. Flip it back, fold and serve.
-
Follow the same steps for making the rest of the dosas.
Video
Notes
- To check if the pan is hot enough to make dosa, sprinkle a few drops of water over the tawa & if it is ready, it should sizzle.
- Rubbing tawa with onion dipped in oil will prevent dosa from sticking to the tawa, so try not to skip it.
- For best results, dosa should be fried on medium heat.
- Dosa should be served hot and can not be refrigerated.
- Salt to be added ONLY to the quantity of batter you are using to avoid the batter getting too sour.
- If you are not using all of the batter, store the remaining unsalted batter in an air tight container in the fridge for up to 3 days or freeze the batter for up to a month. Bring the batter to room temperature before making dosa.
Nutrition
This article was researched and written by Navya Khetarpal.
The post Dosa Recipe | How to Make Dosa appeared first on My Food Story.